This is the first part of a two-part series. In this post, I will introduce Flask-RestPlus and demonstrate how to start organising APIs around its simple REST-based conventions. Next time, I will address the topic of request/response marshalling (serialisation) and validation.
A seasoned Spring developer, I felt a bit uneasy when designing and future-proofing a Flask-based API for the first time. I have recently started using Python way beyond my original intention to just play with data, and found Flask to be a super-easy micro-service alternative to Spring Boot or Ktor. The one thing I was really concerned about, was making sure that the API request/response format was standardised (think, providing a Swagger schema), well-documented, and validated. While working with Java, much of this would come straight from the compiler itself, due to the static-type nature of the language. When you combine this with a couple of great libraries like Jackson and SpringFox, the API communication gets documented and validated with minimal intrusion to the actual code. In Python, this would require tedious if-else checks all over the place … or so I thought.
Flask-RestPlus to the Rescue
Unlike Django, Flask does not come with batteries included, but there is a whole ecosystem of open-source libraries and extensions contributed by the community. One of these is called Flask-RestPlus and it is the absolute dream-come-true for every Flask API designer. Flask-RestPlus is a Flask extension library, and as the name suggests, it helps ease the building of structured RESTful APIs with minimal setup, and encourages best practices. Flask RestPlus follows certain conventions, but does not insist on them, the way Django does. In a way, Flask-RestPlus tries to help organise a growing Flask project, but without it losing its minimal overhead, which is the greatest charm of Flask.
The goal of this series is to start with a simple Flask app, and try to address the following points with a bit of Flask-RestPlus at a time:
- Structure and auto-document an API (Part 1)
- Ensure request/response payload validation (Part 2)
Demo App
Let’s start with a simple Flask-based API for a conference management application:
from flask import Flask

app = Flask(__name__)


@app.route("/conferences/")
def get_all__conferences():
    """
    returns a list of conferences
    """

@app.route("/conferences/", methods=['POST'])
def add_conference():
    """
    Adds a new conference to the list
    """

@app.route("/conferences/<int:id>")
def get_conference(id):
    """
    Displays a conference's details
    """

@app.route("/conferences/<int:id>")
def edit_conference(id):
    """
    Edits a selected conference
    """
Installing Flask-RestPlus is easy
pip install Flask-RestPlus
Let’s simply introduce an Api object for now, try to wrap our app instance with it, replace the routing decorators, and see what happens:
from flask import Flask
from flask_restplus import Api

app = Flask(__name__)
api = Api(app=app)


@api.route("/conferences/")
def get_all__conferences():
    pass


@api.route("/conferences/", methods=['POST'])
def add_conference():
    """
    Adds a new conference to the list
    """

@api.route("/conferences/<int:id>")
def get_conference(id):
    """
    Displays a conference's details
    """

@api.route("/conferences/<int:id>")
def edit_conference(id):
    """
    Edits a selected conference
    """
As soon as the app starts, we will get the following error:
AttributeError: 'function' object has no attribute 'as_view'
This is because if you want to use RestPlus for some of your Flask functions, you have to enclose them in a scoping class. Not only that, but inside the enclosing class, you should name your methods, corresponding to the HTTP methods that REST is based on: GET, POST, PUT, and DELETE:
@api.route("/conferences/")
class ConferenceList(Resource):
    def get(self):
        """
        returns a list of conferences
        """
Before anyone starts objecting, let me explain why this is helpful. Flask-RestPlus uses the Flask concept of “Pluggable Views” to introduce Resource (as in, REST resource).
Let’s be honest. While most Flask applications start simple, many of them outgrow the initial idea, and cramming several handler functions in the main module scope quickly becomes a mess. This is why Flask Blueprints exist to help split common functionality into multiple modules.
Flask-RestPlus makes great use of Blueprints too, as I will demonstrate later, but Resources go one level of granularity further. A Resource class can have multiple methods, but each one should be named after one of the accepted HTTP verbs. What if you need more than one GET or POST method for your API? Well, create multiple Resource classes and put each method in the corresponding resource class. It might look a little overwhelming at first, coming from the cut-the-boilerplate nature of Flask, but with a bit of playing around, it won’t be a brainer at all, and it will pay off tremendously in the long run.
Let’s see how our tiny app will look after the transformations:
from flask import Flask
from flask_restplus import Api, Resource

app = Flask(__name__)
api = Api(app=app)


@api.route("/conferences/")
class ConferenceList(Resource):
    def get(self):
        """
        returns a list of conferences
        """

    def post(self):
        """
        Adds a new conference to the list
        """


@api.route("/conferences/<int:id>")
class Conference(Resource):
    def get(self, id):
        """
        Displays a conference's details
        """

    def put(self, id):
        """
        Edits a selected conference
        """
With this tiny bit of overhead (if you even consider this any overhead at all), you get so much in return. Start the app and point to http://localhost:5000. You will see that the index page has turned into a Swagger UI, which shows the already defined API endpoints, neatly organised into categories (namespaces):
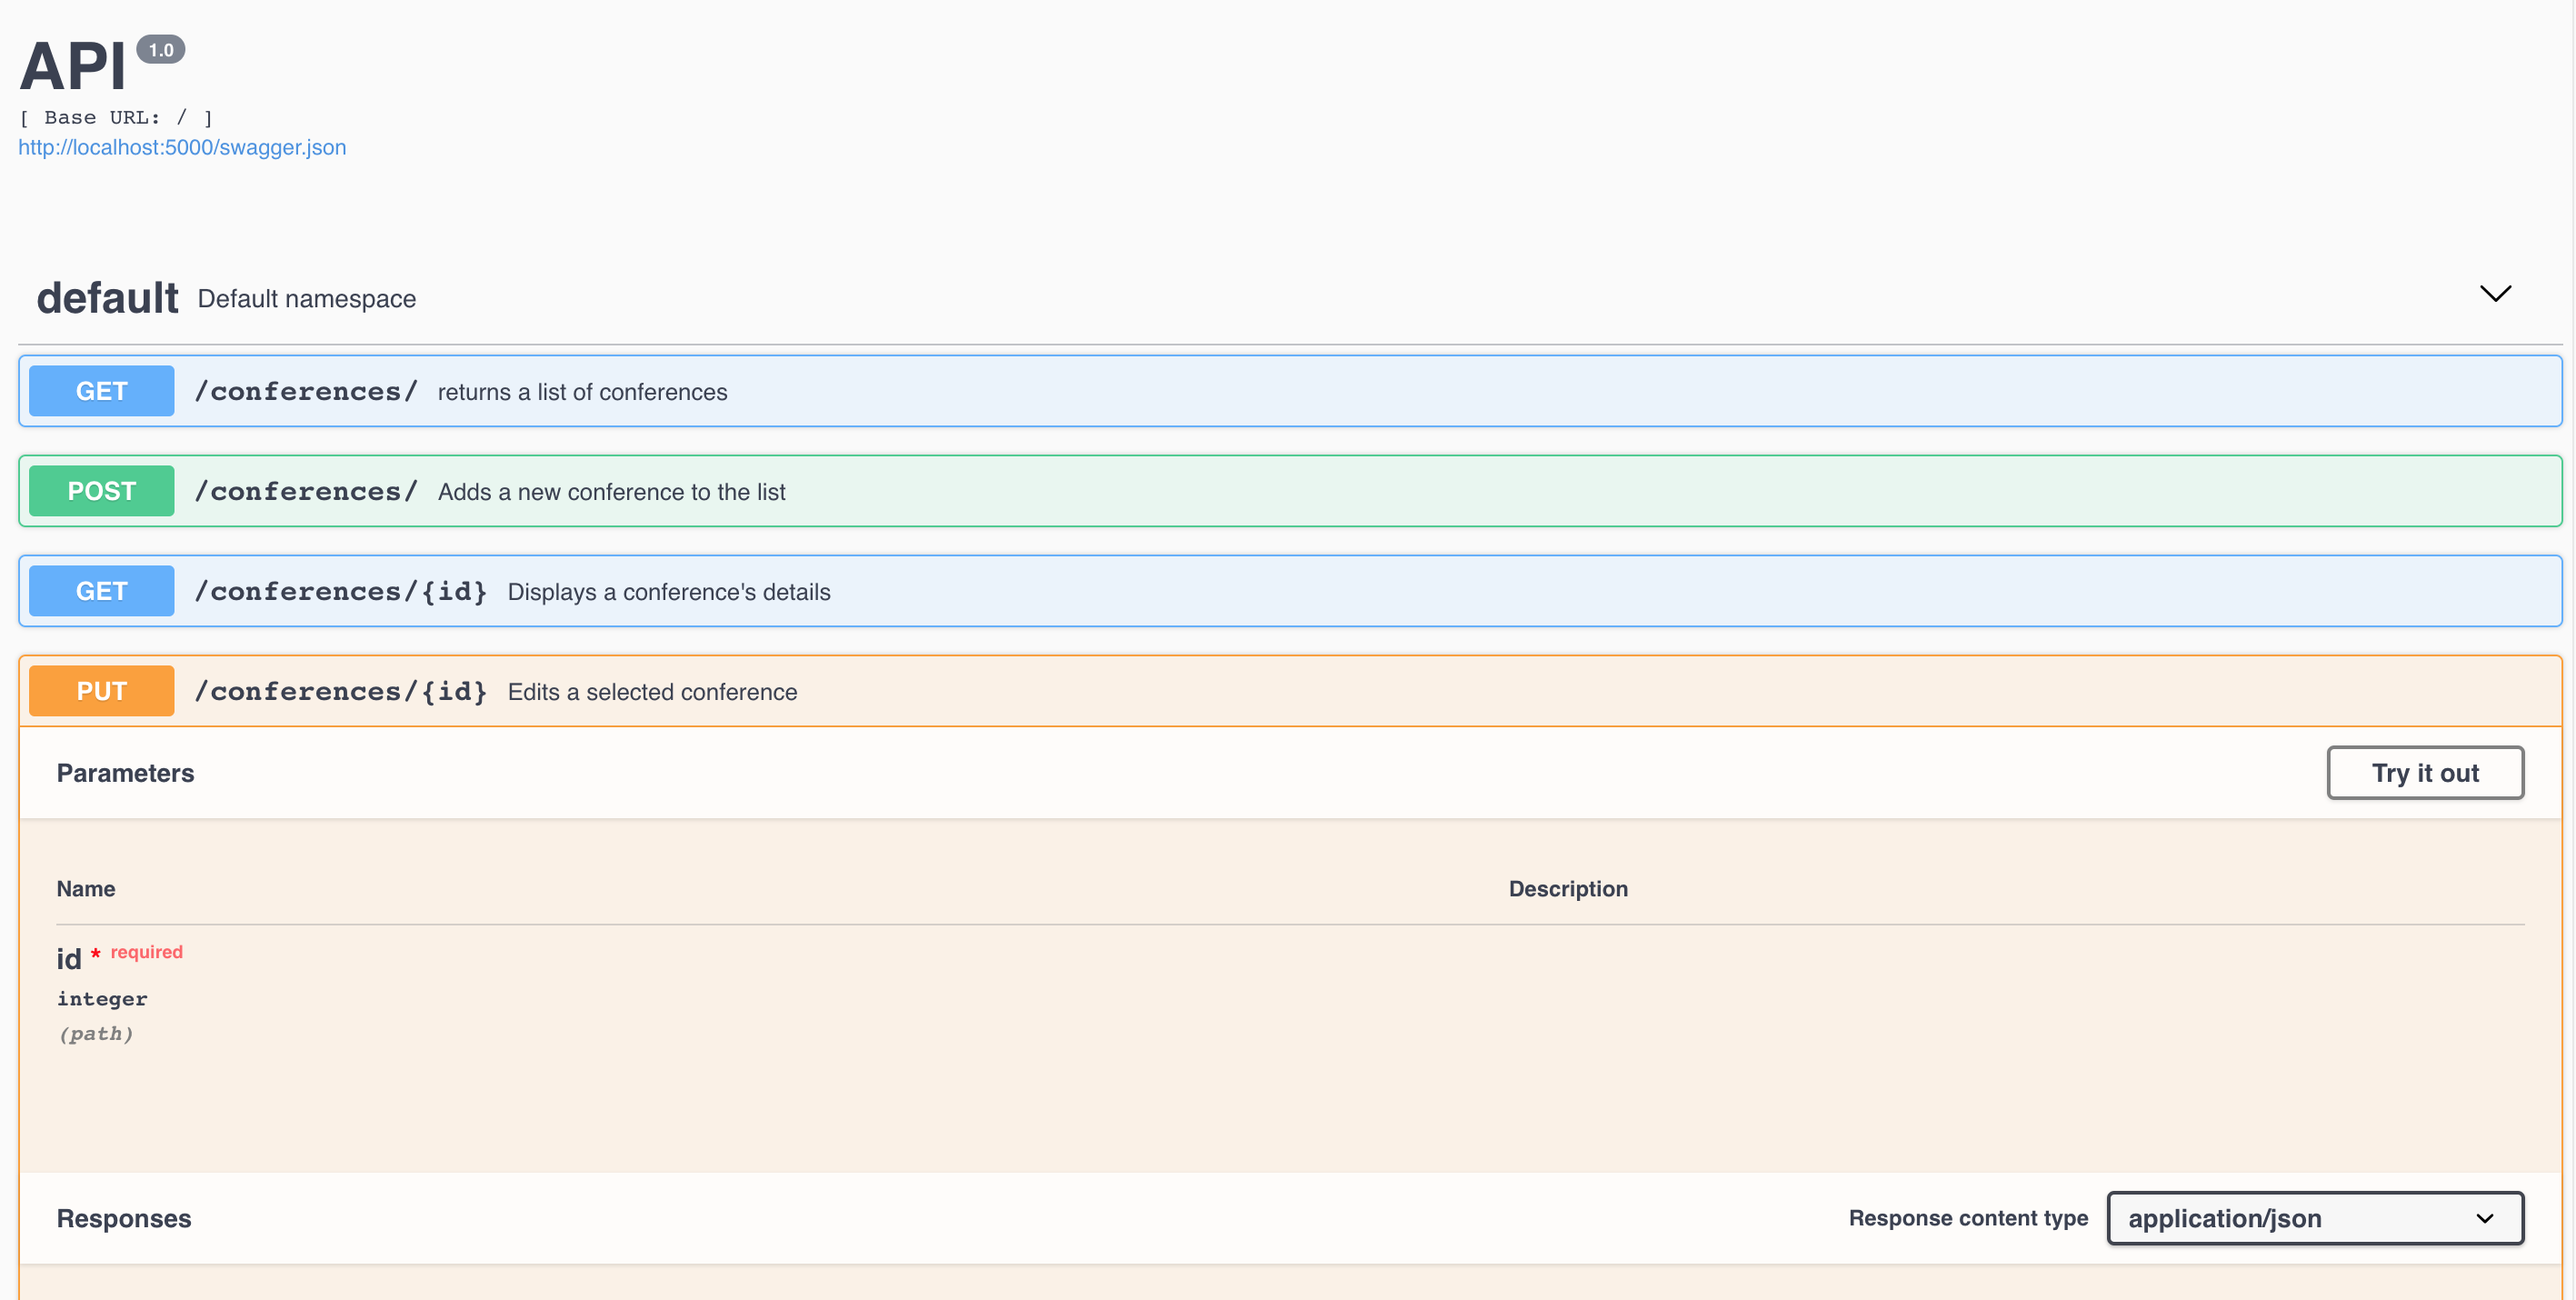
This is great for documenting, playing with, and sharing you API schema around. Yet, this is by far not the only thing that Flask-RestPlus does for you. It goes beyond simply documenting the API, in ensuring that the API is compliant with the schema. Put simply, Flask-RestPlus makes sure that if certain request parameters are marked as mandatory, or if request/response models are supposed to have a certain structure, those are checked and validated at runtime. In my opinion, this is real advantage of Flask-RestPlus, sitting on top of a Flask application. The current example is too simple to demonstrate the real power of request/response marshalling and validation, but both will be throughly described in Part 2.
Namespaces
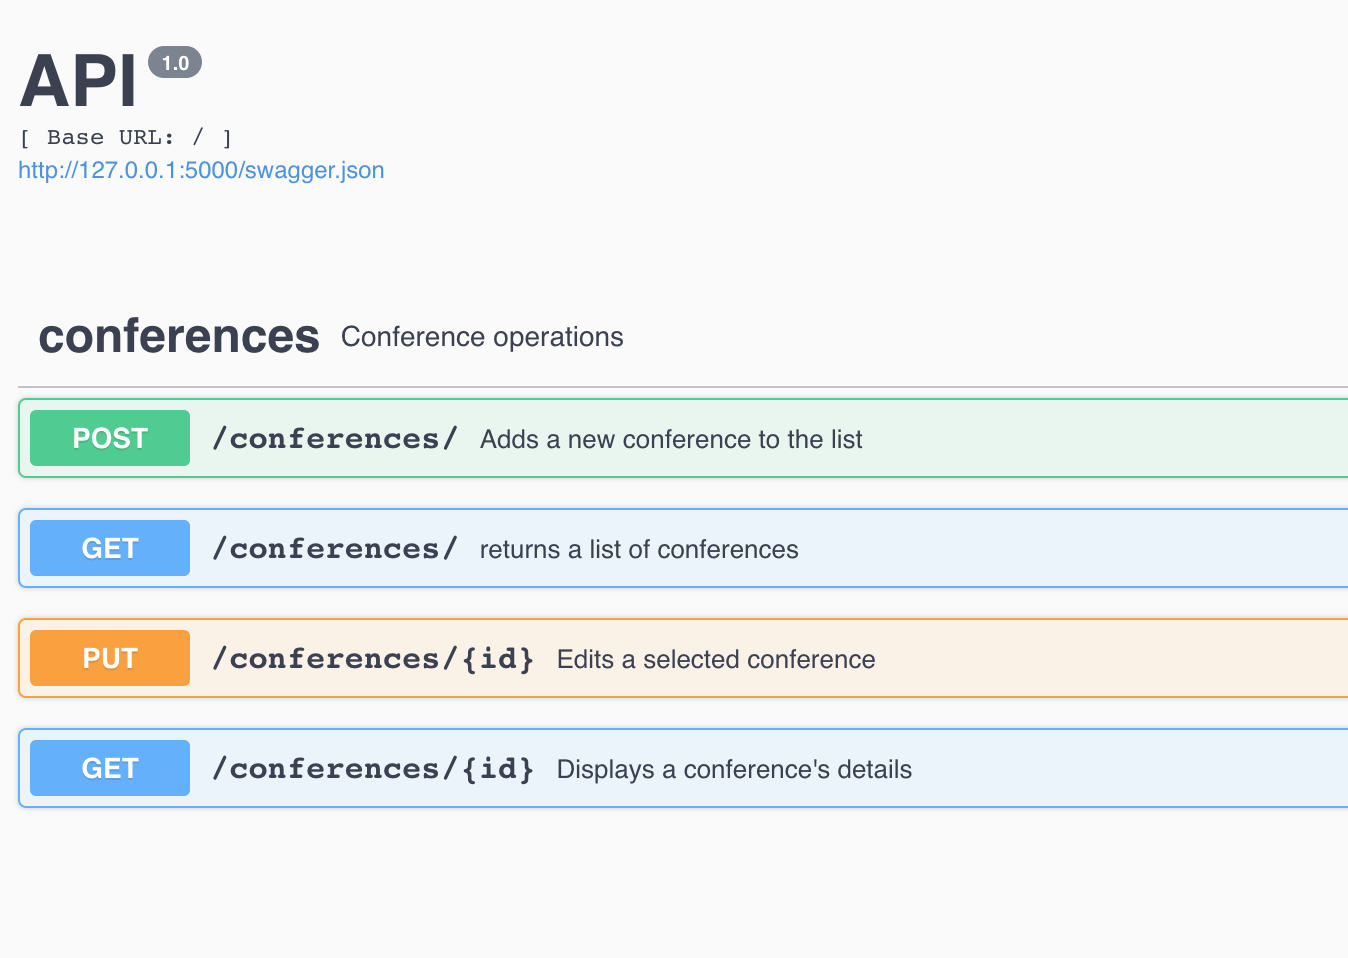
Namespaces are optional, and add a bit of additional organisational touch to the API, mainly, from a documentation point of view. A namespace allows you to group related Resources under a common root, and is simple to create:
ns_conf = api.namespace('conferences', description='Conference operations')
To bring certain Resources under a given namespace, all you need to do, is to replace @api with @ns_conf. Notice also that the name of the namespace replaces the name of the resource, so endpoints can simply to refer to /, instead of copying the name of the resource time and again:
from flask import Flask
from flask_restplus import Api, Resource

app = Flask(__name__)
api = Api(app=app)
ns_conf = api.namespace('conferences', description='Conference operations')


@ns_conf.route("/")
class ConferenceList(Resource):
    def get(self):
        """
        returns a list of conferences
        """

    def post(self):
        """
        Adds a new conference to the list
        """


@ns_conf.route("/<int:id>")
class Conference(Resource):
    def get(self, id):
        """
        Displays a conference's details
        """

    def put(self, id):
        """
        Edits a selected conference
        """
One will notice afterwards that the Swagger UI display has changed too, to reflect the namespacing:
Blueprints
Flask Blueprints are a popular way of designing modular applications. The same applies to Flask-RestPlus. The production version of our application will certainly outgrow the four endpoints we started with. There might be other resources, or at the very least, you might want to move to move your API away from the root of your app. Both cases are a perfect candidate for a Blueprint. Let’s move all of our API endpoints under /api/v1, without touching the routes of even one of them. This example is coming straight from the Flask-RestPlus documentation, and is illustrative enough to help close this chapter of the journey:
Create a Blueprint the usual way, and instead of wrapping our app instance with the RestPlus API, we will wrap the Blueprint instead. This way, independent of our app, we are free to move our API part into a different module: (e.g. blueprint/api.py)
from flask import Blueprint
from flask_restplus import Api

blueprint = Blueprint('api', __name__)
api = Api(blueprint)

# Bring in the rest of our API code here
This leaves only a tiny bit of bridging code to introduce the Blueprint to the main app, and set the URL prefix. The next time you start your app, the API endpoints will be accessible only under the specified URL prefix (/api/v1).
from flask import Flask
from apis import blueprint as api

app = Flask(__name__)
app.register_blueprint(api, url_prefix='/api/1')
Las but not least, it is always a good idea to move the Swagger UI documentation away from the root. As in everything else in RestPlus, this part is extremely ease, too. You can override the default location by passing an additional parameter to the initialiser:
api = Api(app=app, doc='/docs')
This sums up the first part of my series. I hope that it was informative, and will help you structure your Flask-based REST APIs better in the future. Till next time!
Further Reading
Flask (A Python Microframework)
How to structure a Flask-RESTPlus web service for production builds

Leave a comment